Select "Use Git and optional Unix tools from the Command Prompt" and click
on "Next".
Click on "Next".
Click on "Next".
Keep "Checkout Windows-style, commit Unix-style line endings" selected.
Select "Use Windows' default console window" and click on "Next".
Click on "Next".
Click on "Finish".
This will provide you with both Git and Bash in the Git Bash program.
macOS / Mac OS X
The default shell in all versions of macOS (formerly Mac OS X) is Bash, so no
need to install anything. You access Bash from the Terminal
(found in
/Applications/Utilities). You may want to keep
Terminal in your dock for this class.
Linux
The default shell is usually Bash, but if your
machine is set up differently you can run it by opening a
terminal and typing bash. There is no need to
install anything.
Git
Git is a version control system that lets you track who made changes
to what when and has options for easily updating a shared or public
version of your code
on github.com. You will need a
supported
web browser (current versions of Chrome, Firefox, Safari,
Microsoft Edge, or Internet Explorer version 11 or above).
Windows
Git should be installed on your computer as part of your Bash
install (described above).
macOS / Mac OS X
For OS X 10.9 and higher, install Git for Mac
by downloading and running the most recent "mavericks" installer from
this list.
After installing Git, there will not be anything in your /Applications folder,
as Git is a command line program.
For older versions of OS X (10.5-10.8) use the
most recent available installer labelled "snow-leopard"
available here.
Linux
If Git is not already available on your machine you can try to
install it via your distro's package manager. For Debian/Ubuntu run
sudo apt-get install git and for Fedora run
sudo yum install git.
Text Editor
When you're writing code, it's nice to have a text editor that is
optimized for writing code, with features like automatic
color-coding of key words. The default text editor on macOS and
Linux is usually set to Vim, which is not famous for being
intuitive. if you accidentally find yourself stuck in it, try
typing the escape key, followed by :q! (colon, lower-case 'q',
exclamation mark), then hitting Return to return to the shell.
For this class we will use atom as
the default editor. It is free, open source, available on Windows,
macOS, and Linux, powerful but also accessible for entry-level
programmers.
Windows
atom is a good editor that is
suitable for professional coding but also accessible to
newcomers with is graphical user interface.
To install it,
download a suitable installer from atom.io
and double click on the file to run it. (If you cannot find an
appropriate installer, look for a file "AtomSetup-x64.exe" or
"AtomSetup.exe" in the list of
latest releases.)
For more details see Installing atom on Windows.
Others editors that you can use are
Notepad++ or
Sublime Text.
Be aware that you must
add its installation directory to your system path.
Please ask your instructor to help you do this.
Windows (on ASU laptop without superuser
privileges)
On the ASU school laptops, Sublime Text 3 is pre-installed
and you can use it instead of atom. Launch the editor from the Start Menu.
Customize the PATH environment so that you can launch
sublime_text.exe from the command line:
Open the Git-Bash command line
Create the file $HOME/.bash_profile with the following content by typing
This will instruct Bash to look for your sublime text
editor.
macOS / Mac OS X
We recommend atom as a good editor that is
suitable for professional coding but also accessible to
newcomers with is graphical user interface.
To install it,
download a suitable installation zip file from atom.io
and double click on the file to unpack it. Open your
Applications directory from the Finder in the Go menu. Drag the unpacked
Atom application to your Applications directory. (If you cannot find an
appropriate installer, look for a file "atom-mac.zip" or
in the list of
latest releases.) For more details see Installing atom on Mac.
Alternatively, nano is a basic editor.
It should be pre-installed.
We recommend atom as a good editor that is
suitable for professional coding but also accessible to
newcomers with is graphical user interface.
Please follow the instructions on Installing
atom on Linux and ask an instructor for help if anything
is unclear.
Alternatively, nano is a basic editor.
It should be pre-installed.
Python is a popular language for
scientific computing, and great for general-purpose programming as
well. Installing all of its scientific packages individually can be
a bit difficult, so we recommend
Anaconda,
an all-in-one installer.
Regardless of how you choose to install it,
please make sure you install Python version 3.x
(e.g., 3.4 or 3.5 is fine).
We will teach Python using the Jupyter notebook, a programming environment
that runs in a web browser. For this to work you will need a reasonably
up-to-date browser. The current versions of the Chrome, Safari and
Firefox browsers are all supported
(some older browsers, including Internet Explorer version 9
and below, are not).
Install Python 3 using all of the defaults for installation except make sure to check Make Anaconda the default Python.
Windows (on ASU laptops without
sysadmin and existing system anaconda)
If you are stuck with a laptop where you can only install as
a user and there is already a system-wide anaconda installation
present then you will need to install your own anaconda and make
sure that it is being used.
Install Python 3 using all of the defaults for installation.
(Installation requires using the shell. If you aren't
comfortable doing the installation yourself
stop here and request help.)
Open a terminal window.
Type
bash Anaconda-
and then press
tab. The name of the file you just downloaded should
appear.
Press enter. You will follow the text-only prompts. When
there is a colon at the bottom of the screen press the down
arrow to move down through the text. Type yes and
press enter to approve the license. Press enter to approve the
default location for the files. Type yes and
press enter to prepend Anaconda to your PATH
(this makes the Anaconda distribution the default Python).
VPython
For 3D visualization, we will use Jupyter vpython within the Jupyter notebook
interface. This is not part of anaconda and so we need to install it separately after the anaconda installation.
Windows
Open the git-bash shell commandline (Start Menu: All
Programs: Git: Git Bash)
Type in the command line
pip install vpython
macOS / Mac OS X
Open the Terminal (command line)
Type
pip install vpython
Linux
Open the Terminal (command line)
Type
pip install vpython
Testing
Bash shell
Open a terminal (macOS, Linux) or open Git Bash (under
All Programs/Git/Git Bash) in Windows.
Type
echo$SHELL
Should show /bin/bash or /usr/bin/bash (or similar).
We use "shell" and "terminal" (and "console") pretty
interchangeably.
Git
In the shell, type
git --version
which should show something like git version 2.7.0.
editor (atom)
(If you don't have atom but some other editor such as Sublime Text
check the section on Editor under
Windows (ASU) and ask an instructor for help.)
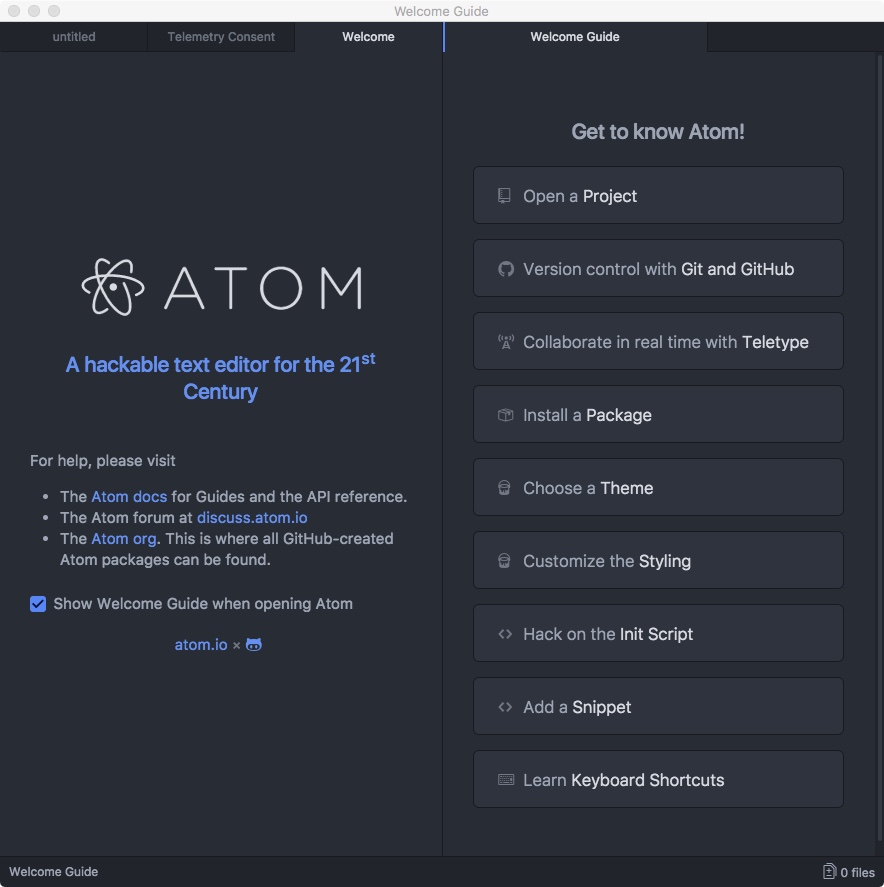
First time
Open atom using your GUI
Windows: from the start menu
macOS: from the Application folder
Linux: varies (but you might be able to skip to "From the shell"
A window should open showing the atom logo and welcome screen, similar
to
If it tries to install additional commands (atom and apm) then let
it do it and provide your system administrator password if required.
Then exit the editor again (Quit from the menu or close the
window).
From the shell
In the shell, type
atom
It should open the editor. Exit the editor.
If this does not work then you need to let atom install additional commands.
Open the (Command
Palette),
choosing the instructions appropriate for your platform. In the
Command Palette type Window: Install Shell Commands (and provide
your system administrator password if requested).
Python
In the shell, type
python -c'import sys; print(sys.version)'
which should give something similar to 3.5.3 |Anaconda custom (x86_64)| (default, Mar 6 2017, 12:15:08) (and more
stuff). Important: you should have Python 3, i.e., a version like
3.5.x or 3.6.x
Under Notebooks select Python or Python
[conda root] (if it is shown)
In the new window ("Untitled"), type
print("Hello World!")
and press shift and return keys simultaneously to evaluate the
cell. It should print "Hello World!".
Close the browser tab with menu File: Close and Halt.
In the files listing, select from New under Notebooks select
Python [conda root] or VPython (if available)
In the new window ("Untitled2"), type
importvpythonasvpbox=vp.box()
and press shift and return keys simultaneously to evaluate the
cell. It should open a graphics window in the notebook showing a
cube. Use the mouse with right mouse button presse to turn the cube
(on macOS, press control while clicking/pressing the touch pad to
get "right click").
Close the browser tab with menu File: Close and Halt.
On macOS, if you get the error OSError: [Errno 49] Can't assign
requested address you might need to use jupyter notebook
--ip=127.0.0.1
Wrong conda is used. Check which conda in the terminal: it
should show a path in your home directory (e.g., for user "physics":
Windows: /c/Users/Physics/Anaconda3/conda, macOS:
/Users/physics/Anaconda3/conda, Linux:
/home/physics/Anaconda3/conda). Try exiting the terminal and open
a new terminal (or git bash) and try again. Changes to PATH only
take effect when a new shell is opened.
The box in VPython is not visible, only a blank square. Try
opening the notebook in the Chrome web browser instead of
Explorer/Edge: Just type http://localhost:8888 in Chrome's URL bar.